select volume 0remove letter = Dassign letter Z =select disk 1Attributes disk clear readonlyonline diskconvert MBRcreate partition primaryassign letter = dformat fs = ntfs quick label = "DATA"ActiveExit
Tuesday, July 28, 2015
Diskpart / s
Wednesday, February 1, 2012
Wallpaper does not load in Windows 7 via GPO
A known bug in Windows 7 and Windows Server 2008 R2 is for the loading of the wallpaper, when it is configured via GPO.
To solve the problem, we can take the following actions:
- Enter the machine's registry ( http://en.kioskea.net/faq/589-how-to-open-registry )
- Navigate to the following key:
- HKEY_CURRENT_USER \ Control Panel \ Desktop
- Find the REG_SZ value called Wallpaper
- Change the value with the path where the wallpaper is shared.
You can download a fix that will make the change:
If necessary change on multiple workstations, we can effect such change through thePreferences via GPO. As the image below:
If your domain is Windows Server 2003 and either does not support the Preferences feature, you need the distribution via script to make the change key in the registry.
The following example:
Const HKEY_CURRENT_USER = & H80000001
strComputer = "."
Set oReg = GetObject ("winmgmts: {ImpersonationLevel = impersonate}! \ \" & _
strComputer & "\ root \ default: StdRegProv")
strKeyPath = "Control Panel \ Desktop"
strValueName = "Wallpaper"
strValue = "\ \ server \ share \ wallpaper.jpg"
oReg.SetStringValue HKEY_LOCAL_MACHINE, strKeyPath, strValueName, strValue
Libraries and removes the Control Panel icon from the desktop
Personal
This tip can be useful when we set a very restrictive policy in Windows 7 ... .. when we forced the classic theme, the system includes a shortcut on the desktop shell of theLibraries folder and Control Panel. Via GPO until you remove the shortcuts, but it is also remove any link placed on the desktop, even if it is created via logon script ...
The method I found to solve this hurdle, it was deleting the following registry keys:
Remove icon library:
Remove icon in Control Panel:
For those who need to do a VBS for this ... ... follows:
Const HKEY_LOCAL_MACHINE = & H80000002
strComputer = "."
on error resume next
Set oReg = GetObject ("winmgmts: {ImpersonationLevel = impersonate}! \ \" & _
strComputer & "\ root \ default: StdRegProv")
strKeyPath =
strKeyPath =
strKeyPath =
oReg.DeleteKey HKEY_LOCAL_MACHINE, strKeyPath
I hope it's useful!
Monday, March 28, 2011
Exchange Server 2010 Deployment Assistance
Guys,
Follow link for Exchange Server 2010 Deployment Assistance. Very useful for migration projects for an organization or native and coexistence with other versions, including BPOS.
# http://technet.microsoft.com/pt-br/exdeploy2010/default.aspx Index
Tuesday, December 28, 2010
Installing SCCM 2007 R2
In this article I describe the installation of System Center Configuration Manager 2007 R2 (R2 SCCM2007).
The first step for installation is to meet all the prerequisites for official mesma.Segue links below regarding these requirements:
Supported configurations:
http://technet.microsoft.com/en-us/library/bb680717.aspx
Preparation for the installation of SQL:
http://technet.microsoft.com/en-us/library/bb632649.aspx
Extending Active Directory Schema:
http://technet.microsoft.com/en-us/library/bb633121.aspx
Installation checklist:
http://technet.microsoft.com/pt-br/library/bb680951 (en-us). aspx
Ports used by Configuration Manager
http://technet.microsoft.com/en-us/library/bb632618.aspx
Required settings in firewalls (local or not):
http://technet.microsoft.com/en-us/library/bb694088.aspx
Requirements for Windows Server 2008:
http://technet.microsoft.com/pt-br/library/cc431377 (en-us). aspx
After setting the requirements, we must run the installation DVD Splash.hta SCCM 2007 SP1.Na window appears, we can validate the requirements with the option "Prepare \ Run the prerequisite checker." After the validation of requirements, we will select the option "Install \ Configuration Manager 2007 SP1," as shown in the image below:
At the beginning of the installation, must choose between installing a Site Server installation or the console administração.Iremos choose the installation of Site Server and click Next.
After accepting the license agreement (which is compulsory acceptance for product installation), the next screen we select the options instalação.Temos single option (already pre-determined) and custom (recommended) where we manually configure our parametros.Iremos choose the custom option (as shown in the picture below, and click Next
We must choose between installing a Primary Site (site containing a database, required if the first site of a structure SCCM) or Secondary Site (only possible if there is already a primary). How we are performing a new deployment, choose the option to install a Site Primário.Clique Next.
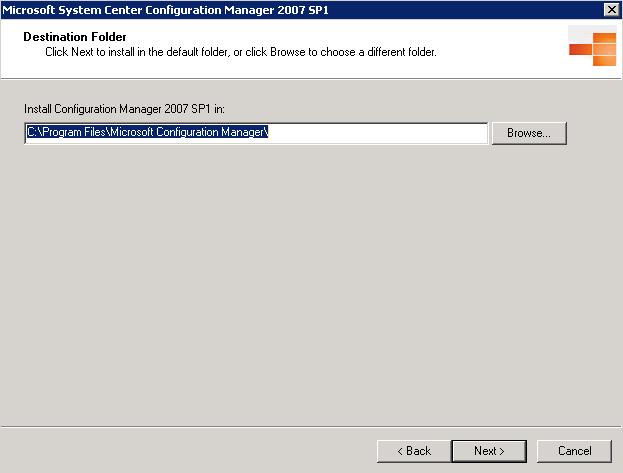
At this stage of installation, we should enable or disable the CEIP to send information to Microsoft (useful for product improvement) and enter the key produto.Após these definitions, we can then choose the path to the installation of SCCM.Após, click Next.
One of the most important steps of the installation is the choice of Site Code and Site Name for this choice is directly related to the design solução.Por this reason, we should always consider a standard and intuitive names that meets the requirements of growth ambiente.Lembrando that the site code and can not be modified or reused.
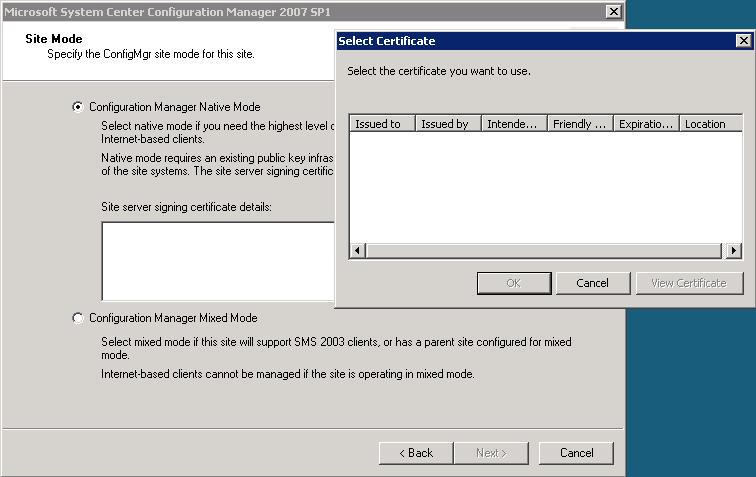
In the Site window mode, we must establish the operating mode of our estrutura.Devemos choose native mode when we do not have a coexistence of SCCM with SMS 2003, noting that the native mode is required PKI (public key infrastructure) for issuing certificates digitais.Devemos choose the mixed mode when we have a coexistence with SMS 2003, whether the level and server or client, or when we have a public key infrastructure.
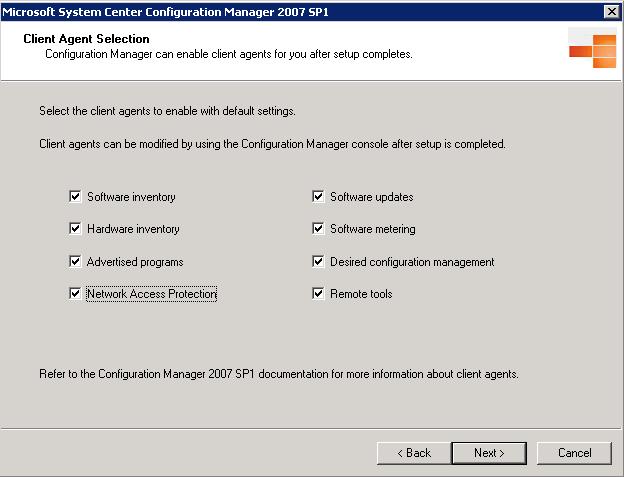
After choosing the mode of operation, we select the features that are enabled in instalação.Lembrando that these resources can be enabled after instalação.Após selecting features, click Next.
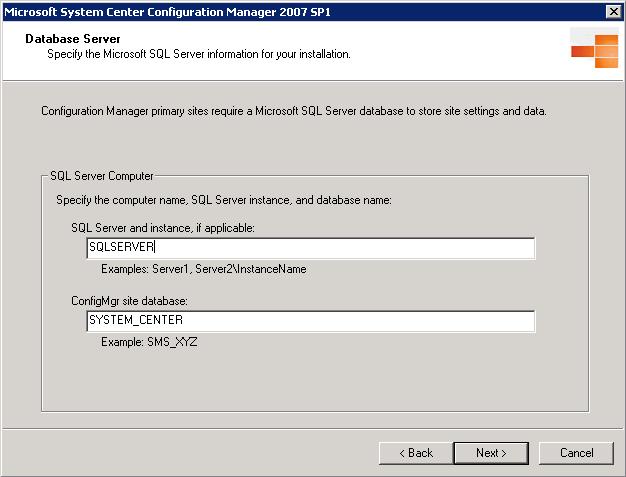
Enter information regarding the database, SQL server, instance, database ... click Next.
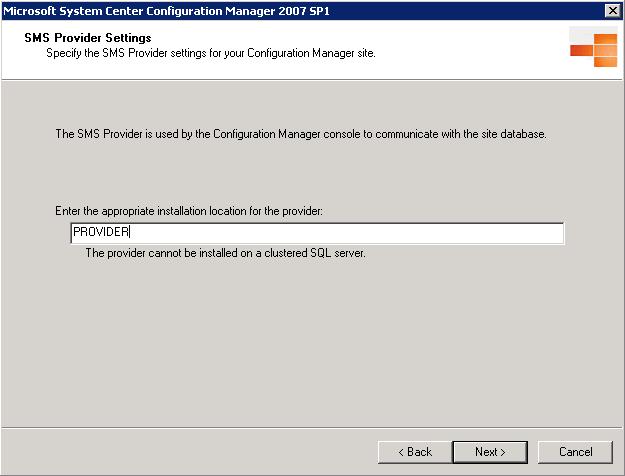
In the window "SMS Provider Settings", we will establish that the SMS PROVIDER will be responsible for reading and writing in the database SCCM.Clique Next. More information about SMS PROVIDER (http://technet.microsoft.com/en -us/library/bb680613.aspx )
We have this step of the installation to add the role of Management Point to our server or we can choose to add this function later by console.Caso decide to add the function, must enter the FQDN of the server as image abaixo.CliqueNext again.
In the Port Settings window, configure the ports for communication between client / servidor.Por standard HTTP port used is port 80, but we can set up another door qualquer.Clique Next.
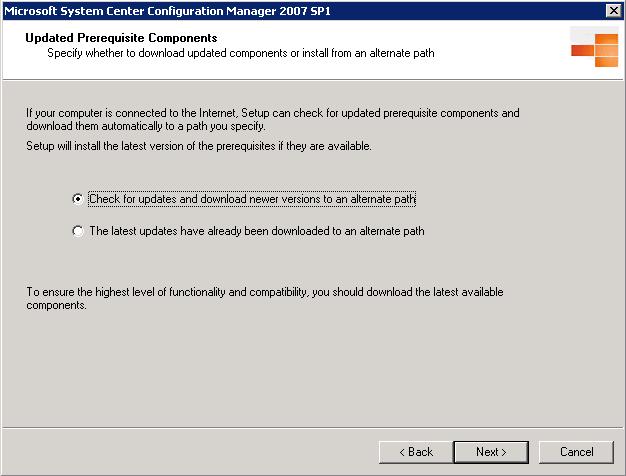
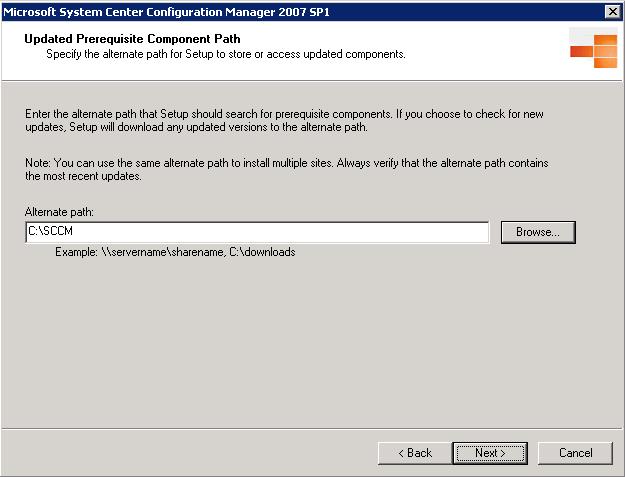
In the next window, the Setup installer will download the prerequisites atualizados.Podemos download the components or can indicate the directory where the components were stored préviamente.Recomendo create directories on the first level and no space in name (eg c: \ SCCM) as shown below, Next.
Enter the directory path where the components will be armasenados.CliqueNext.
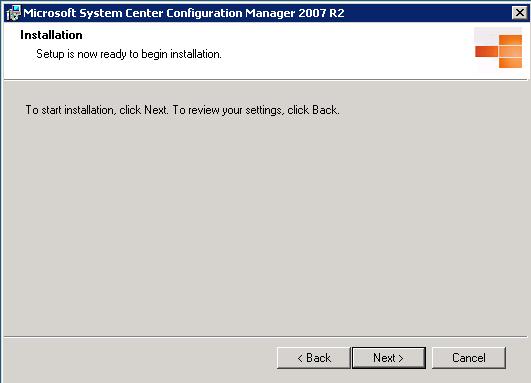
This displays a summary of the settings and start the installation process.
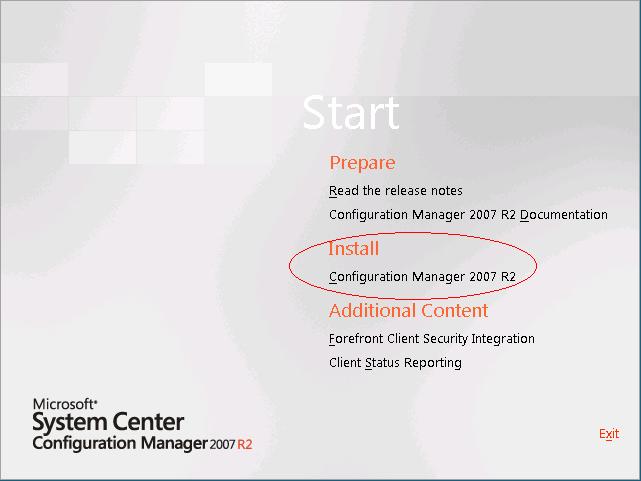
After finishing the installation process for SCCM 2007 SP1 (recommended restarting the server!), We will start the installation of SCCM 2007 R2.From the installation media, we run the Splash.hta and in the window, select the" Install \ Configuration Manager 2007 R2. "
To start the installation process, click Next in the window "Welcome" and in the "Installation".
Click Finish to end the installation.
After installation of SCCM 2007 R2, it would be interesting to test the operation of the console, create the install directories, verification services, installation logs, etc..
Error when upgrading, installing and uninstalling or SCCM 2007
In some cases you may find the following records (below) inConfigmgrSetup.log when installing, upgrading and uninstalling or SCCM.
<11-22-2010 11:40:41> failed with 1300 AdjustTokenPrivileges
<11-22-2010 11:40:41> Could not verify an open MMC instance due to the error.
<11-22-2010 11:40:41> Exiting THREAD_Deinstall.
... Such a problem occurs due to lack of administrative law of the user running the setup, more specifically the right to "Debug programs" on the server.
To assign the right to run secpol.msc and navigate to Local Policies \ User Rights Assignment on the option DEBUG PROGRAMS add the user running the setup.
I hope this is helpful!
Thursday, December 3, 2009
How to reset the restore mode password in Active Directory
In this article, let's resetting a password is commendable in a domain environment at Microsoft, the password used in "directory services Restore mode" which is requested at the time of promoting a server to domain controller during DCPROMO proccess. This password will be used when there is a nessecidade to perform an offline maintenance on the Active Directory data, e.g. a authoritative restore.
There is an aggravating circumstance, mainly in the exchange network administrators, which is not very important documentation this password, which makes offline AD maintenance. To work around this problem, we can reset the password of Restore Mode by doing the following:
At the DOS prompt, run the NTDSUTIL utility, as pictured below …
At the NTDSUTIL prompt, type set dsrm password, to sign in DSRM utility that will reset the password.
If you are running these procedures on the server you want to reset the password, type reset password on server null hit enter and type and confirm a new password of "directory services Restore mode" … if you want the command to be executed on a remote server, type reset password on server <ServerName> reminding you that the password must meet complexity …
After these procedures, type q to exit the DSRM prompt and q again to quit the NTDSUTIL prompt
Now just restart the server and pressing the F8 key to use the "directory services Restore mode" , and good luck in your AD maintenance …
Installing Windows 7 from a Pen-drive
I will show a simple process and pretty cool that is installing Windows 7 through a Pen-drive common…
For the procedures, we will need a pen-drive and DVD install Windows 7 …
Let us prepare the Pen-drive for installation. From the command prompt, you are going to access the application DISKPART to prepare for the partition.
After the opening of the DiskPart prompt, type list disk command to identify the Pen-drive as image below:
Locate the removable disk (in my case, the DISK 1), and then select the same through select disk command <x> (where x is the number of the disk). After the disk check, enter CLEAN command to delete the existing partition on the same …
… now, let's create a primary partition and activate it through the create partition primary command and ACTIVE
We already have the partition created and active, now is the only format … type FORMAT QUICK fs = FAT32, I do quick FAT32 formatting
Our Pen-drive, is now ready, now is the only copy the contents of the DVD to the Pen-drive and bootar the machine by USB. Simple, fast and convenient! rss
I hope that is useful!
Tuesday, December 1, 2009
Windows Server 2008 Step-by-Step
It follows a series of notes on some settings step by step in Windows Server 2008 ...
- Step-by-Step Guide for Read-Only Domain Controllers
- Step-by-Step Guide for Windows Server 2008 Active Directory Domain Services Installation and Removal
- Windows Server 2008 Restartable AD DS Step-by-Step Guide
- Step-by-Step Guide for Using the Active Directory Database Mounting Tool in Windows Server 2008
- Step-by-Step Guide for Windows Server 2008 Active Directory Domain Services Backup and Recovery
- Windows Server 2008 Auditing AD DS Changes Step-by-Step Guide
- Step-by-Step Guide for Fine-Grained Password and Account Lockout Policy Configuration
- Active Directory Domain Services Installed Help